One of the biggest charms for the Midori Traveler's Notebook is it provide so many ways/supplies for DIY, so, to follow the spirit, why not make inserts yourself if you are the traveler's notebook fan?
I have to say, this is my first time to make Midori Insert, and I don,t think it is difficult, to the contrary, it's turn out a great joy to do this.
![diy midori inserts](https://cdn.shopify.com/s/files/1/1304/9757/files/diy_midori_inserts_1_large.jpg?v=1495949536)
First, prepare the supplies and tools: 1 piece of kraft paper to use as the cover, several pieces of A4 paper, ruler, cutter, and a stapler.
![diy](https://cdn.shopify.com/s/files/1/1304/9757/files/diy_midori_inserts_2_large.jpg?v=1495949537)
Both the kraft paper and inner pages are A4 size, you can just use the plain a4 paper or print it in lines/dots/grid as your like.
Here I printed it in lines, if you like this type of page, you can download this Ruled A4 Page.
![diy midori inserts](https://cdn.shopify.com/s/files/1/1304/9757/files/diy_midori_inserts_3_large.jpg?v=1495949536)
![diy midori inserts](https://cdn.shopify.com/s/files/1/1304/9757/files/diy_midori_inserts_4_large.jpg?v=1495949537)
When the paper and cover are ready, align them and fold in half with a bone folder or other similar tools you have.
![diy midori inserts](https://cdn.shopify.com/s/files/1/1304/9757/files/diy_midori_inserts_5_large.jpg?v=1495949537)
![diy midori inserts](https://cdn.shopify.com/s/files/1/1304/9757/files/diy_midori_inserts_6_large.jpg?v=1495949537)
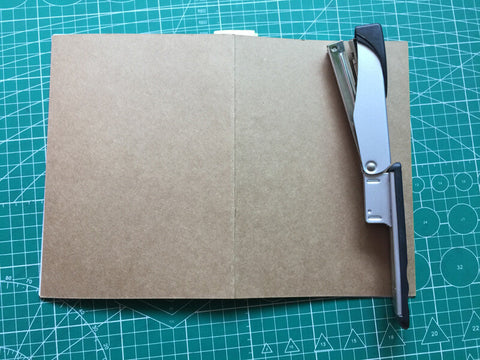
At first, I planned to staple directly, but found not work, the notebook is thick and the mat below is tough.
![diy midori inserts](https://cdn.shopify.com/s/files/1/1304/9757/files/diy_midori_inserts_7_large.jpg?v=1495949537)
![diy midori inserts](https://cdn.shopify.com/s/files/1/1304/9757/files/diy_midori_inserts_8_large.jpg?v=1495949537)
Though it's failed, the good thing is it left hole marks on the kraft paper, I can easily use an awl to pierce the notebook for binding.
![diy midori inserts](https://cdn.shopify.com/s/files/1/1304/9757/files/diy_midori_inserts_9_large.jpg?v=1495949537)
![diy midori inserts](https://cdn.shopify.com/s/files/1/1304/9757/files/diy_midori_inserts_10_large.jpg?v=1495949537)
![diy midori inserts](https://cdn.shopify.com/s/files/1/1304/9757/files/diy_midori_inserts_11_large.jpg?v=1495949537)
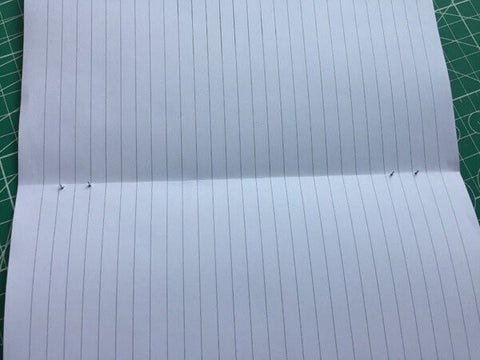
Now bound the notebook with staples.
![diy midori inserts](https://cdn.shopify.com/s/files/1/1304/9757/files/diy_midori_inserts_12_large.jpg?v=1495949537)
It's almost done at this step, only the size is not the same.
![diy midori inserts](https://cdn.shopify.com/s/files/1/1304/9757/files/diy_midori_inserts_13_large.jpg?v=1495949538)
![diy midori inserts](https://cdn.shopify.com/s/files/1/1304/9757/files/diy_midori_inserts_14_large.jpg?v=1495949538)
The size of standard Midori Inserts is 21x11cm, and the size of folded A4 Paper is 21x14cm, so measure and cut it to 21x11cm.
![diy midori inserts](https://cdn.shopify.com/s/files/1/1304/9757/files/diy_midori_inserts_15_large.jpg?v=1495949538)
Done! Not bad, right? Now make yours.